

Easy Steps to Install Your New Dash Cam
Installing a dash cam is one of the easiest ways to enhance your vehicle’s safety and ensure you have reliable video evidence in case of accidents or other incidents. Whether you’re adding a simple front-facing model or upgrading to a dash cam rear view mirror or mirror cam for more functionality, this guide will take you through the steps for a smooth installation process. Here’s a detailed, step-by-step guide to get your new dash cam up and running with minimal effort.
Gather All Necessary Tools and Materials
Before beginning the installation process, make sure you have all the necessary tools and materials for a successful setup. This typically includes the dash cam, mounting brackets, power cables, suction cups or adhesive mounts, and any additional tools for securing the wiring. If you’ve purchased a dash cam rear view mirror or Mirror Cam, ensure that the specific components required for its installation are included. A well-prepared workspace will help you complete the job efficiently and without unnecessary interruptions.
Choose the Best Location for Your Dash Cam
One of the first steps in installing a dash cam is selecting the optimal location in your vehicle. Typically, the best place for the device is near the center of your windshield, behind the rearview mirror. This ensures the camera has a clear view of the road ahead while avoiding obstructing your vision. If you are installing a dash cam rear view mirror or Mirror Cam, position it where it can provide optimal rear-facing visibility, and make sure it doesn’t interfere with other vehicle controls or airbags.
Mount the Dash Cam Securely
Once you’ve chosen the location, it’s time to mount the dash cam. Depending on the type of mount, you may use suction cups, adhesive pads, or the mounting brackets provided. If you’re installing a dash cam rear view mirror, follow the instructions to securely attach it in place of your existing mirror. For Mirror Cams, make sure the mounting bracket fits snugly onto the rearview mirror without obstructing your view of the road. Always ensure the camera is positioned firmly to avoid it becoming loose during travel.
Run the Power Cable Efficiently
The next step involves running the power cable from the dash cam to your vehicle’s power source. For a sleek installation, try to hide the cables along the edges of your windshield or beneath the headliner, which keeps them out of sight. Most dash cams come with a 12V adapter that plugs into your vehicle’s power outlet. For a more permanent solution, you can wire the cam directly into your car’s fuse box, ensuring a clean look without exposed wires. Remember to ensure the power cable is secured to prevent it from getting in the way.
Connect the Dash Cam to Power
Once the power cable is securely run through your vehicle, connect the dash cam to the power source. If you’re using a rearview mirror-style dash cam or Mirror Cam, you may need to use an adapter or specific wiring harness for this step. Plug the power adapter into your vehicle’s cigarette lighter or hardwire it for a more permanent installation. Make sure the connection is firm, and test the device before finalizing the installation to ensure it powers up correctly.
Test the Dash Cam Position
Before securing everything in place, test the position of your dash cam. Start your car, turn on the dash cam, and check its camera view to ensure the field of vision is clear and unobstructed. Adjust the angle of the camera if necessary so that it captures a wide view of the road, especially if you have a dash cam rear view mirror or Mirror Cam that includes both front and rear camera functions. Fine-tuning the camera’s position ensures you get the best footage for your needs.
Configure the Dash Cam Settings
Once the dash cam is powered on and positioned correctly, it’s time to configure the settings. This typically involves adjusting the video resolution, parking mode, loop recording, and other preferences to suit your needs. If you’re installing a dash cam rear view mirror or Mirror Cam, take the time to explore additional settings such as the rear camera’s brightness or tilt, if applicable. Many modern dash cams also have Wi-Fi or smartphone connectivity, allowing you to easily adjust settings through an app.
Secure the Wiring for a Neat Installation
For a clean, professional look, ensure that the wiring is neatly secured and out of sight. Tuck the power cables along the edges of the windshield or use cable clips to keep them in place. If you’re installing a dash cam rear view mirror or Mirror Cam, consider using hidden wiring techniques to avoid any exposed cables that may detract from the vehicle’s interior. A neat installation not only looks better but also minimizes the risk of the cables interfering with airbags or other critical vehicle components.
Test the Dash Cam Recording Functionality
With everything set up and secured, it’s time to test the recording functionality of your dash cam. Start your car and ensure the camera starts recording automatically. For Mirror Cams, test both the front and rear cameras to confirm that both are functioning correctly. Check the quality of the video to ensure it meets your expectations. If there are any issues with recording, such as poor image quality or a lack of audio, consult the camera’s manual or adjust the settings for optimal results.
Mount the Rear Camera (If Applicable)
If your dash cam includes a rear camera, now is the time to mount it. Most rear cameras are designed to be installed at the back of the vehicle, usually near the license plate or rear windshield. Carefully route the cables from the dash cam to the rear of the vehicle, ensuring they are securely fastened along the interior trim. Test the rear camera once it’s mounted to make sure it captures a clear view of the rear surroundings. Adjust the angle if necessary for optimal visibility.
Secure the Rear Camera Wiring
Once the rear camera is mounted, make sure the wiring is properly secured along the vehicle’s interior. You can use cable clips or adhesive mounts to hold the wires in place, ensuring they don’t become loose or interfere with other vehicle functions. For a cleaner look, consider hiding the wires within the interior trim or along the edges of the doors. This will keep everything neat and out of sight, giving your dash cam installation a polished, professional finish.
Test Both Front and Rear Cameras
After completing the installation, test rear view mirror camera to make sure everything is working as expected. Check the video quality, ensuring both cameras capture clear, wide-angle footage. If your dash cam rear view mirror or Mirror Cam model has features like motion detection or parking mode, test those as well to ensure they function correctly. Make any necessary adjustments to camera angles or settings to get the best results from both cameras.
Finalize the Dash Cam Installation
Once you’ve tested the camera’s functionality and made any necessary adjustments, it’s time to finalize the installation. Double-check all wiring to ensure everything is securely fastened and out of sight. Clean any smudges or fingerprints from the camera lens for clear video recording. If you used adhesive mounts, make sure they’ve fully adhered to the surfaces. With the installation complete, you can rest assured that your dash cam is ready to protect you on the road.
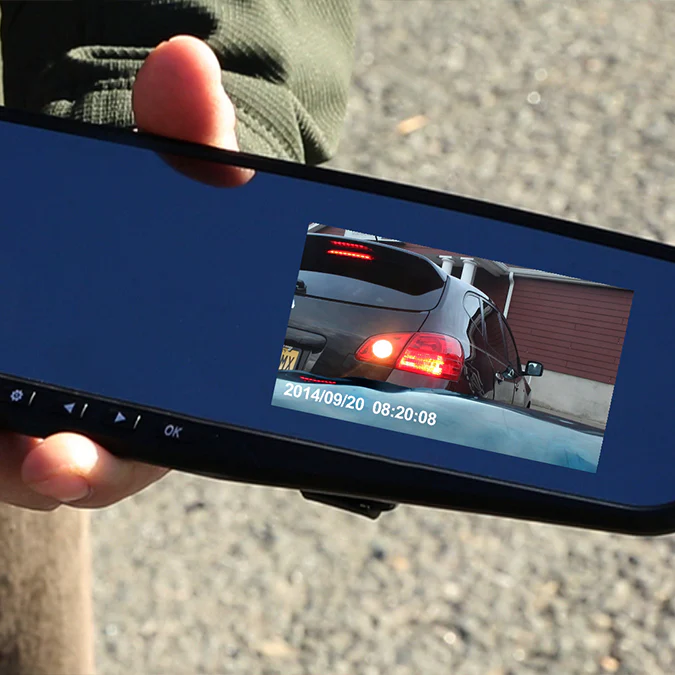
How Do I Install a Dash Cam Rear View Mirror?
Installing a dash cam rear view mirror is quite similar to a regular dash cam. Begin by mounting the Mirror Cam in place of your existing rearview mirror, using the provided mounting bracket or adhesive. Secure the power cable and connect it to your vehicle’s power source. Once the rearview mirror is mounted, configure the camera settings and test the footage to ensure everything is working properly.
Can I Install a Dash Cam Myself?
Yes, installing a dash cam is a straightforward process that can typically be done by yourself. Most dash cams come with easy-to-follow instructions. If you’re installing a dash cam rear view mirror or Mirror Cam, follow the specific installation guide included. Ensure you have the necessary tools and take your time to secure the device and wires properly.
What is the Difference Between a Dash Cam and a Mirror Cam?
A dash cam typically refers to a small, front-facing camera that records video footage of the road ahead. A mirror cam, on the other hand, is a more advanced model that replaces your standard rearview mirror and may include both front and rear-facing cameras. Mirror Cams offer additional features like parking mode, wider coverage, and a sleek, integrated design.