
Comprehensive Guide to Hopper Window Installation
Hopper windows are a practical and efficient choice for various spaces in your home, particularly in areas like basements, bathrooms, and laundry rooms. Their unique design—hinged at the bottom and opening inward—offers excellent ventilation and natural light while maintaining privacy and security.
In this detailed guide, we’ll explore the benefits of hopper window installation provide step-by-step installation instructions, and answer common questions to help you make an informed decision.
What Are Hopper Windows?
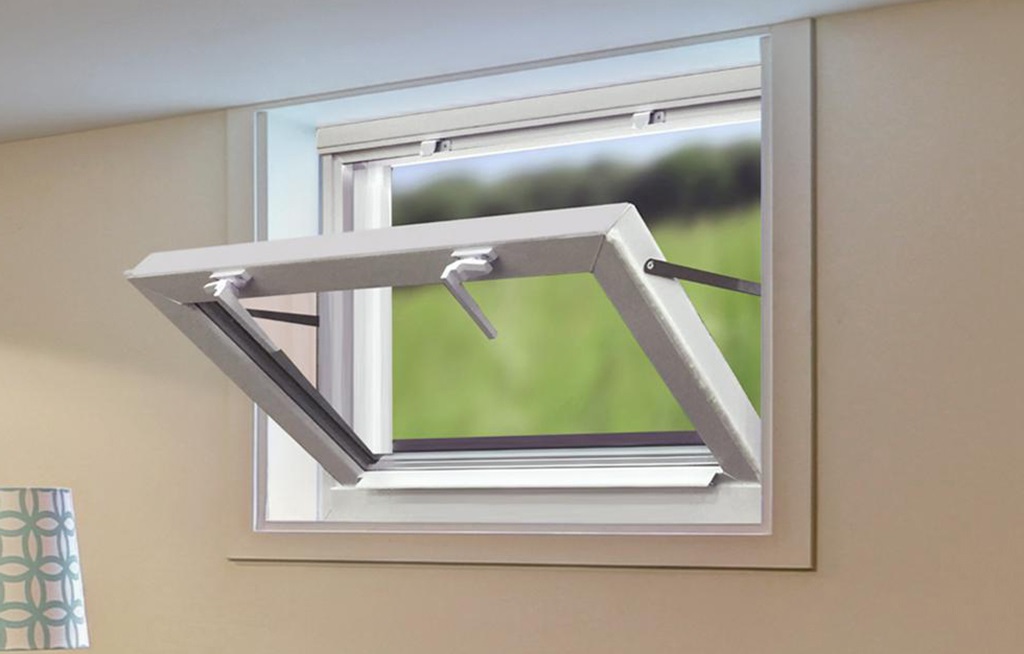
Hopper windows are small, inward-opening windows hinged at the bottom. They are commonly used in basements, bathrooms, and other confined spaces where traditional windows might not fit or function effectively. Their design allows for optimal ventilation and natural light without compromising privacy.
Benefits of Hopper Windows
- Enhanced Ventilation: The inward-opening design allows for efficient airflow, helping to reduce humidity and prevent mold growth, especially in basements and bathrooms.
- Energy Efficiency: When closed, hopper windows form a tight seal, minimizing drafts and improving insulation, which can lead to lower energy bills.
- Space-Saving: Their compact size makes them ideal for small or narrow spaces where other window types may not be suitable.
- Security: The small opening and inward swing make it difficult for intruders to access, enhancing the security of your home.
Tools and Materials Needed
Before starting the installation, gather the following tools and materials:
- Tape measure
- Level
- Drill and drill bits
- Screwdriver
- Shims
- Caulk and caulk gun
- Screws (typically #8 x 2″)
- Safety gloves and goggles
Step-by-Step Installation Guide
Step 1: Measure the Opening
Accurate measurements are crucial for a proper fit. Measure the width and height of the window opening. Ensure that the rough opening is square and level.
Step 2: Prepare the Opening
Remove any debris, old trim, or window components from the opening. Check the sill for level and make adjustments as necessary.
Step 3: Position the Window
Place the hopper window into the opening, ensuring that it is centered and level. Use shims to adjust the fit as needed.
Step 4: Secure the Window
Once the window is properly positioned, secure it by driving screws through the side jambs into the framing. Be careful not to overtighten, as this can distort the frame.
Step 5: Seal the Window
Apply a bead of caulk around the perimeter of the window where it meets the wall to prevent air and water infiltration.
Step 6: Install Trim
After the caulk has dried, install interior and exterior trim to cover any gaps and enhance the window’s appearance.
Maintenance Tips for Hopper Windows
- Regular Cleaning: Clean the window glass and frame periodically to remove dirt and debris.
- Check Seals: Inspect the weatherstripping and seals for wear and replace them as needed to maintain energy efficiency.
- Lubricate Hinges: Apply lubricant to the hinges to ensure smooth operation.
- Inspect for Damage: Regularly check the window for any signs of damage or wear and address issues promptly to prolong its lifespan.
Frequently Asked Questions
What is the difference between a hopper window and an awning window?
A hopper window opens inward from the top and is hinged at the bottom, whereas an awning window opens outward from the bottom and is hinged at the top. Both provide ventilation, but the direction of opening differs.
Can hopper windows be used as emergency exits?
Due to their small size and inward-opening design, hopper windows are not suitable as emergency exits. They are primarily intended for ventilation and light in confined spaces.
Are hopper windows energy-efficient?
Yes, hopper windows are energy-efficient. Their tight seal when closed helps to prevent drafts and maintain consistent indoor temperatures, leading to potential energy savings.
Where are hopper windows commonly installed?
Hopper windows are commonly installed in basements, bathrooms, laundry rooms, and other areas where space is limited and ventilation is needed.
Why Choose Best Home Remodeling for Your Window Installation
At Best Home Remodeling, we specialize in providing high-quality window installation services, including hopper windows. Our team of experienced professionals ensures that each installation is performed with precision and care, adhering to industry standards and local building codes.
We understand the importance of energy efficiency, security, and aesthetics in your home. That’s why we offer a wide range of window options to suit your specific needs and preferences.
Choose Best Home Remodeling for your window installation needs and experience the difference in quality and service.
Conclusion
Hopper windows are an excellent choice for enhancing ventilation, natural light, and privacy in small or confined spaces. Their energy-efficient design and security features make them a valuable addition to any home.
If you’re considering hopper window installation or need assistance with other home improvement projects, contact Best Home Remodeling today. Our team is ready to help you transform your home with quality craftsmanship and exceptional service.
